In standard contemporary kitchen design, utility is traditionally concealed behind solid, opaque cabinet doors. While functional, hiding every culinary tool can leave a kitchen feeling flat, sterile, and devoid of human warmth. Whimsical kitchen shelf decor takes the opposite stance: it treats the open shelving and perimeter countertops as a living, three-dimensional gallery that reflects the homeowner’s personal passions, culinary rituals, and love of storied vintage objects. From stacking vibrant, mismatched ceramic bowls to leaning moody framed paintings against tiled backsplashes, open storage brings joyful energy directly into everyday meal preparation.
However, open shelving is one of the most demanding interior features to maintain. Without strict architectural planning, open ledges easily collect greasy cooking films, while disorganized piles of mismatched dishware quickly create visual exhaustion. True styled maximalism is not about displaying everything you own; it is about establishing intentional rhythm, contrasting textures, respecting negative space, and anchoring heavy storage securely into wall framing. The following guide details the structural tolerances, color-blocking techniques, vertical clearances, and maintenance protocols required to master open whimsical storage.
Structural Engineering: Shelf Depth, Vertical Clearance, and Weight Limits
Before styling a single plate or antique teapot, you must ensure your open shelving can physically support the dense dead load of ceramic and cast-iron cookware. Collapsing shelves present severe safety hazards in an active kitchen.
Dimensions and Stud-Anchoring Calculations
To safely hold heavy dinnerware sets while maintaining comfortable hand access:
- Optimal Shelf Depth and Thickness: Specify solid hardwood shelves (such as white oak, ash, or hard maple) measuring 10 to 12 inches deep (25 to 30 cm) and 1.5 to 2 inches thick (38 to 50 mm). Shelves shallower than 10 inches cannot hold standard 10.5-inch dinner plates, while shelves deeper than 12 inches cast heavy shadows over lower prep counters.
- Weight Ratings and Stud Spacing: A 4-foot stack of ceramic plates, stoneware mixing bowls, and glass jars easily weighs 80 to 120 lbs. Never rely on hollow-wall drywall anchors. Fasten heavy-duty forged steel or cast-iron support brackets directly into wall framing studs spaced 16 or 24 inches on center using 3-inch structural lag screws, ensuring a minimum load rating of 50 to 75 lbs per linear foot.
- Ergonomic Vertical Clearances: Mount the lowest open shelf 15 to 18 inches (38 to 46 cm) above the finished countertop to accommodate countertop appliances and coffee makers. Maintain a vertical spacing of 10 to 14 inches (25 to 35 cm) between stacked shelves to allow comfortable two-handed stacking of tall mixing bowls and carafes.
For more foundational principles on planning kitchen layouts and open cabinetry, explore our overarching pillar guide to whimsical kitchen ideas, as well as our hybrid architectural analysis in modern whimsical kitchen spaces.
The 30% Negative Space Rule: Balancing Density and Breathing Room
The single greatest mistake in open shelf styling is cramming every square inch of timber with decorative objects. When shelves are overloaded, the human eye cannot focus, and the display reads as cluttered chaos rather than curated design.
The Golden Ratio of Open Storage
To achieve high-end styled maximalism, adhere to structured negative space guidelines:
- Preserving 25% to 30% Open Surface: Leave exactly one-quarter to one-third of every shelf plane completely empty. Group items into tight, deliberate vignettes—such as a stack of bowls flanked by a glass jar—and leave a 4 to 6 inch gap of bare timber before the next grouping. This negative space allows the eye to rest and highlights the sculptural outline of each ceramic piece.
- Asymmetrical Triangle Balancing: Style objects in visual triangles across multiple shelf tiers. If you place a tall amber glass jug on the left side of the top shelf, balance it with a medium-height majolica pitcher in the center of the middle shelf, and an ironstone tureen on the right side of the lower shelf. This dynamic triangular rhythm guides the gaze fluidly across the wall.
If you are planning open display in a compact apartment or galley layout, consult our tailored spatial recommendations in small whimsical kitchens.
Color-Blocked Ceramic Groupings: Organizing the Rainbow
Whimsical kitchens thrive on saturated color, but scattering mismatched colored dishes randomly across shelves creates visual static. The secret to professional styling is deliberate color blocking.
Curating Monochromatic Ceramic Blocks
Organizing dishware by color transforms functional plates into a bold graphic installation:
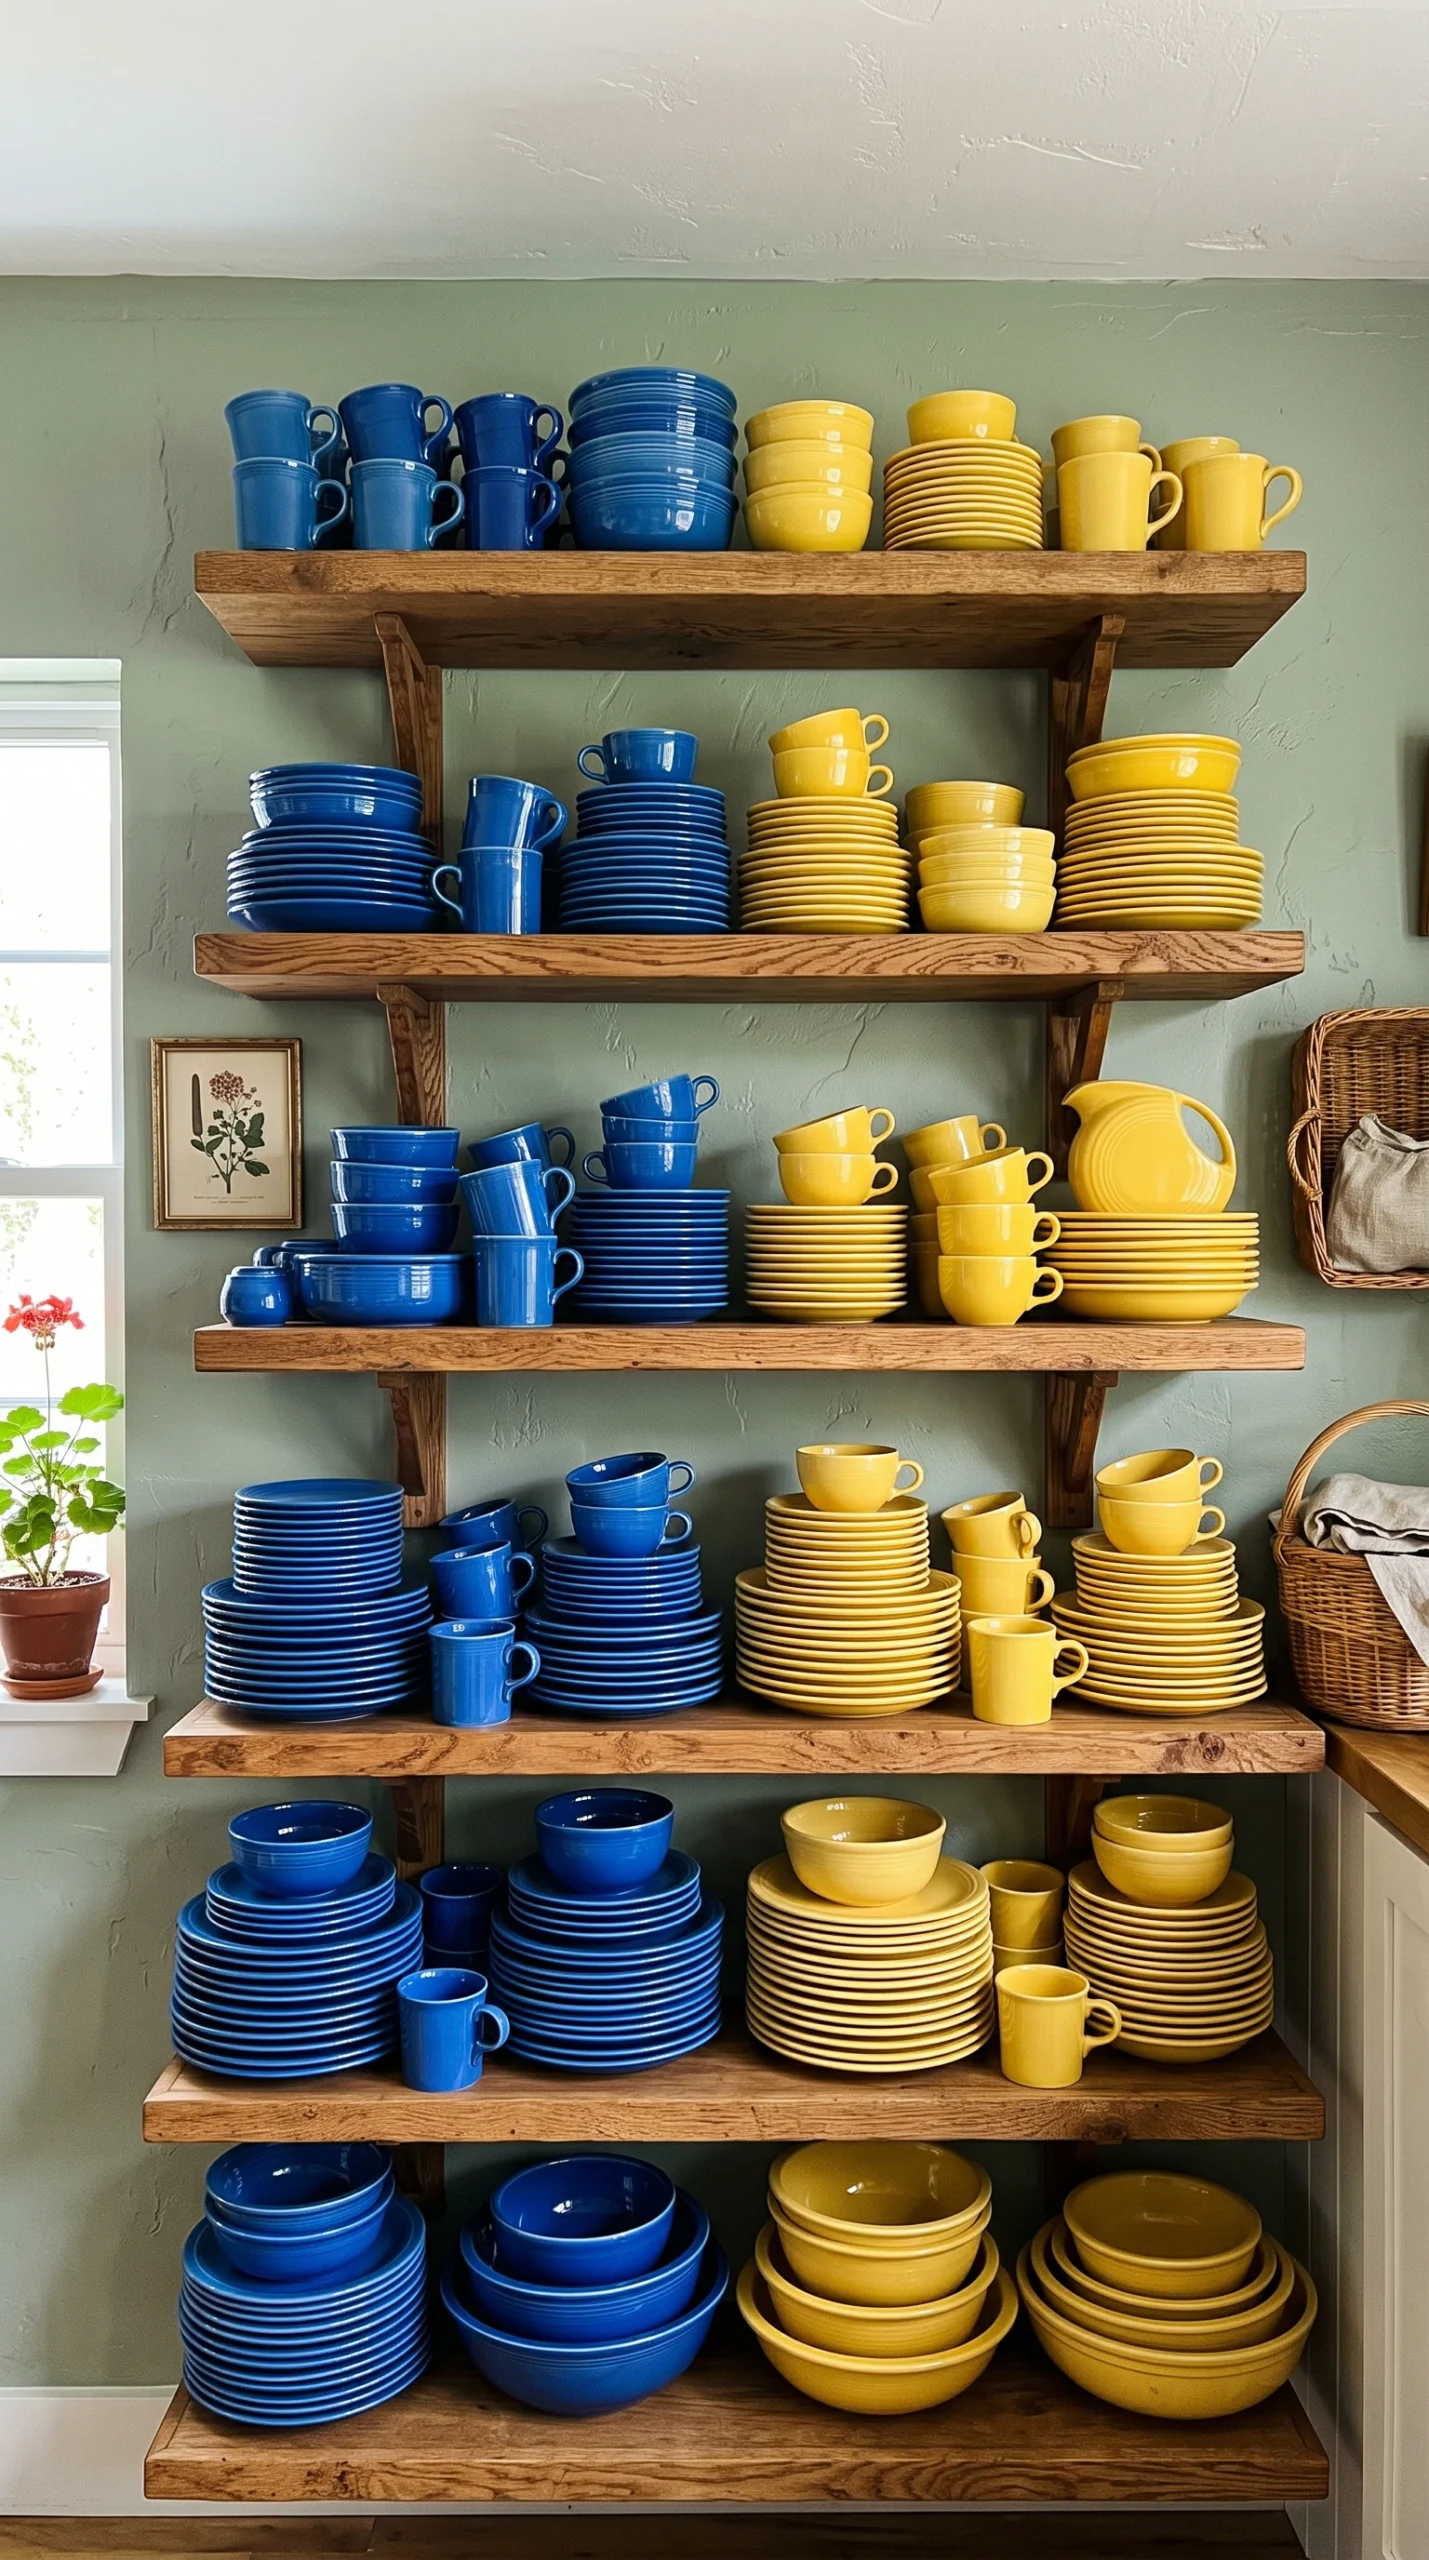
- Solid Color Masses: Group dishes of identical or closely related hues into dense, single-color blocks. Place a stack of six sunshine yellow luncheon plates beside a yellow milk-glass sugar bowl, followed by a gap, and then a dense grouping of cobalt blue mugs and bowls. Treating dishware as blocks of pure pigment brings architectural order to multi-colored collections.
- Contrasting Refined and Rustic Textures: On a single shelf, pair contrasting material finishes. Place delicate, hand-painted floral bone china teacups directly beside a heavy, thick-walled brown stoneware batter bowl. The interplay between fragile, glossy porcelain and rugged, earthy pottery creates captivating tactile tension.
To master the broader art of coordinating vibrant cabinetry and wall paints with open displays, explore our comprehensive guides on whimsical kitchen color strategies and colorful whimsical kitchens.
Under-Shelf Brass Hooks: Utilizing Vertical Headroom
In standard open shelving, the 3 to 4 inches of open vertical space beneath each shelf is typically wasted. Installing specialized hardware beneath timber ledges unlocks functional storage while infusing vintage charm.
Installing Teacup and Mug Rails
Suspending drinkware beneath shelves frees up valuable shelf space while creating an authentic cottage scullery feel:
- Hook Spacing and Alignment: Screw solid unlacquered brass shoulder hooks into the underside of the lowest wooden shelf, spacing them 4 to 6 inches (10 to 15 cm) apart along a straight chalk line set 2 inches back from the front shelf edge.
- Curating the Hanging Row: Hang a collection of patterned vintage bone china teacups or hand-thrown ceramic mugs by their handles. Suspended in a continuous row, the hanging mugs add playful, layered depth beneath straight timber shelves.
- Hanging Utensils and Bundles: Alternatively, use under-shelf hooks to suspend small copper measuring cups, wire whisks, or bundles of dried garden lavender, adding fragrant natural texture.
For more ideas on rustic hardware detailing and pastoral finishes, review our companion piece on cottagecore kitchen design.
Fine Art Layering: Leaning Framed Oil Paintings
Rather than hanging pictures on empty walls, advanced whimsical styling integrates framed artwork directly onto the shelves and counters.
Artwork Placement and Backdrops
Leaning framed artwork behind dishware introduces unexpected fine-art sophistication into the workspace:
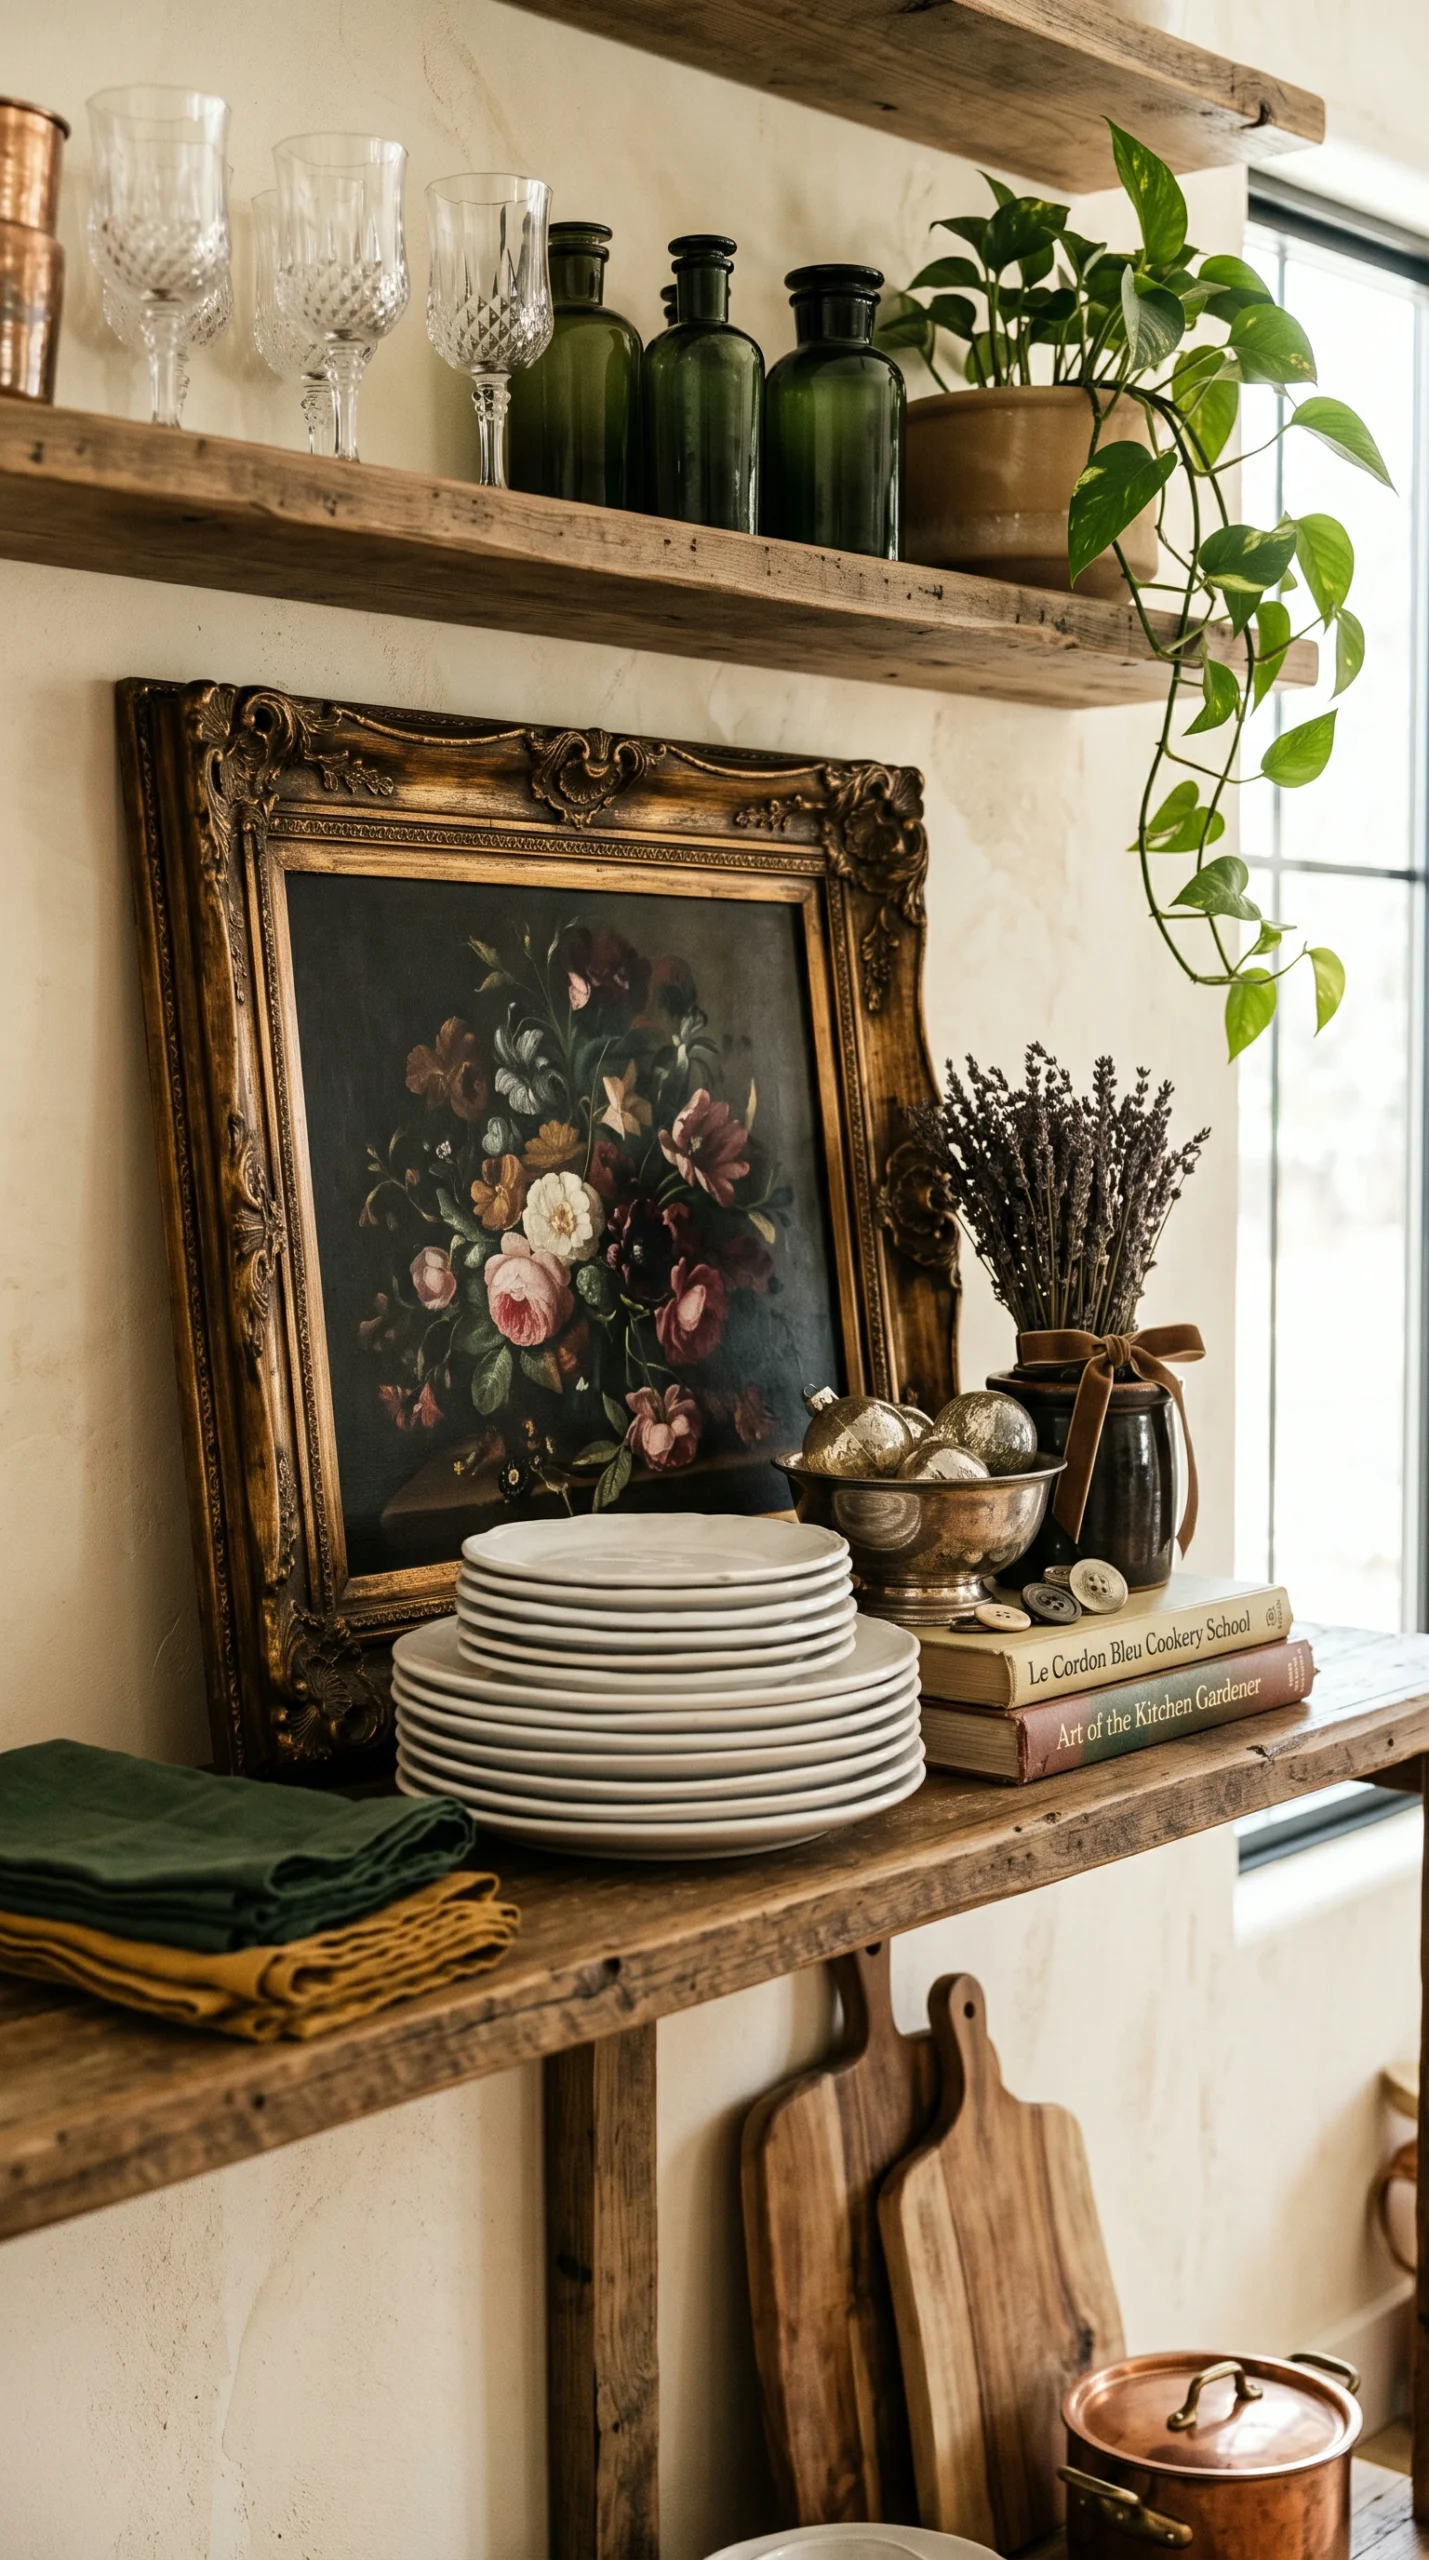
- Scale and Framing: Choose framed vintage oil paintings or botanical prints measuring 8×10 to 11×14 inches (20×25 to 28×35 cm) housed in ornate, tarnished gilded gold or carved timber frames.
- The Layered Backdrop Technique: Lean the framed painting directly against the rear backsplash wall on the shelf, and then place a stack of plain white or cream ceramic plates slightly overlapping the front of the frame. The painting acts as a rich, painterly backdrop, elevating everyday dishes into an artful still life.
- Clearances from Cooktops: Never place unglazed oil paintings on shelves directly adjacent to or above a gas cooktop where boiling steam and airborne grease will degrade the canvas. Position framed art strictly on shelves located in cool prep or coffee stations, at least 36 inches away from active burners.
For ideas on framing backsplashes with statement tiles and wallpaper, review our dedicated guide on whimsical kitchen backsplash designs, as well as our curation of whimsical kitchen decor pieces.
Decanting and the Countertop Containment Tray
Plastic commercial packaging, branded cardboard cereal boxes, and cluttered condiment bottles instantly undermine whimsical charm. Decanting dry pantry staples into vintage glass vessels bridges practical food storage with antique beauty.
Glass Apothecary Jars and Botanical Vessels
Transforming everyday groceries into textural shelf displays:
- Apothecary Decanters: Decant dried pulses, heirloom beans, rolled oats, farro, and patterned pasta shapes into clear glass apothecary jars standing 8 to 12 inches tall. Ensure jars feature airtight silicone or ground-glass gasket seals to keep dry goods fresh and pest-free. The natural colors and shapes of the grains provide warm, organic texture across the shelf.
- Botanical Accent Vessels: Repurpose antique floral metal tea tins, vintage stoneware crocks, or green majolica pitchers to hold trailing English ivy, fresh rosemary branches, or olivewood spatulas, allowing leafy vines to soften sharp wooden shelf edges.
The Countertop Containment Tray Formula
To keep perimeter countertops functional and clean while displaying whimsical vignettes:
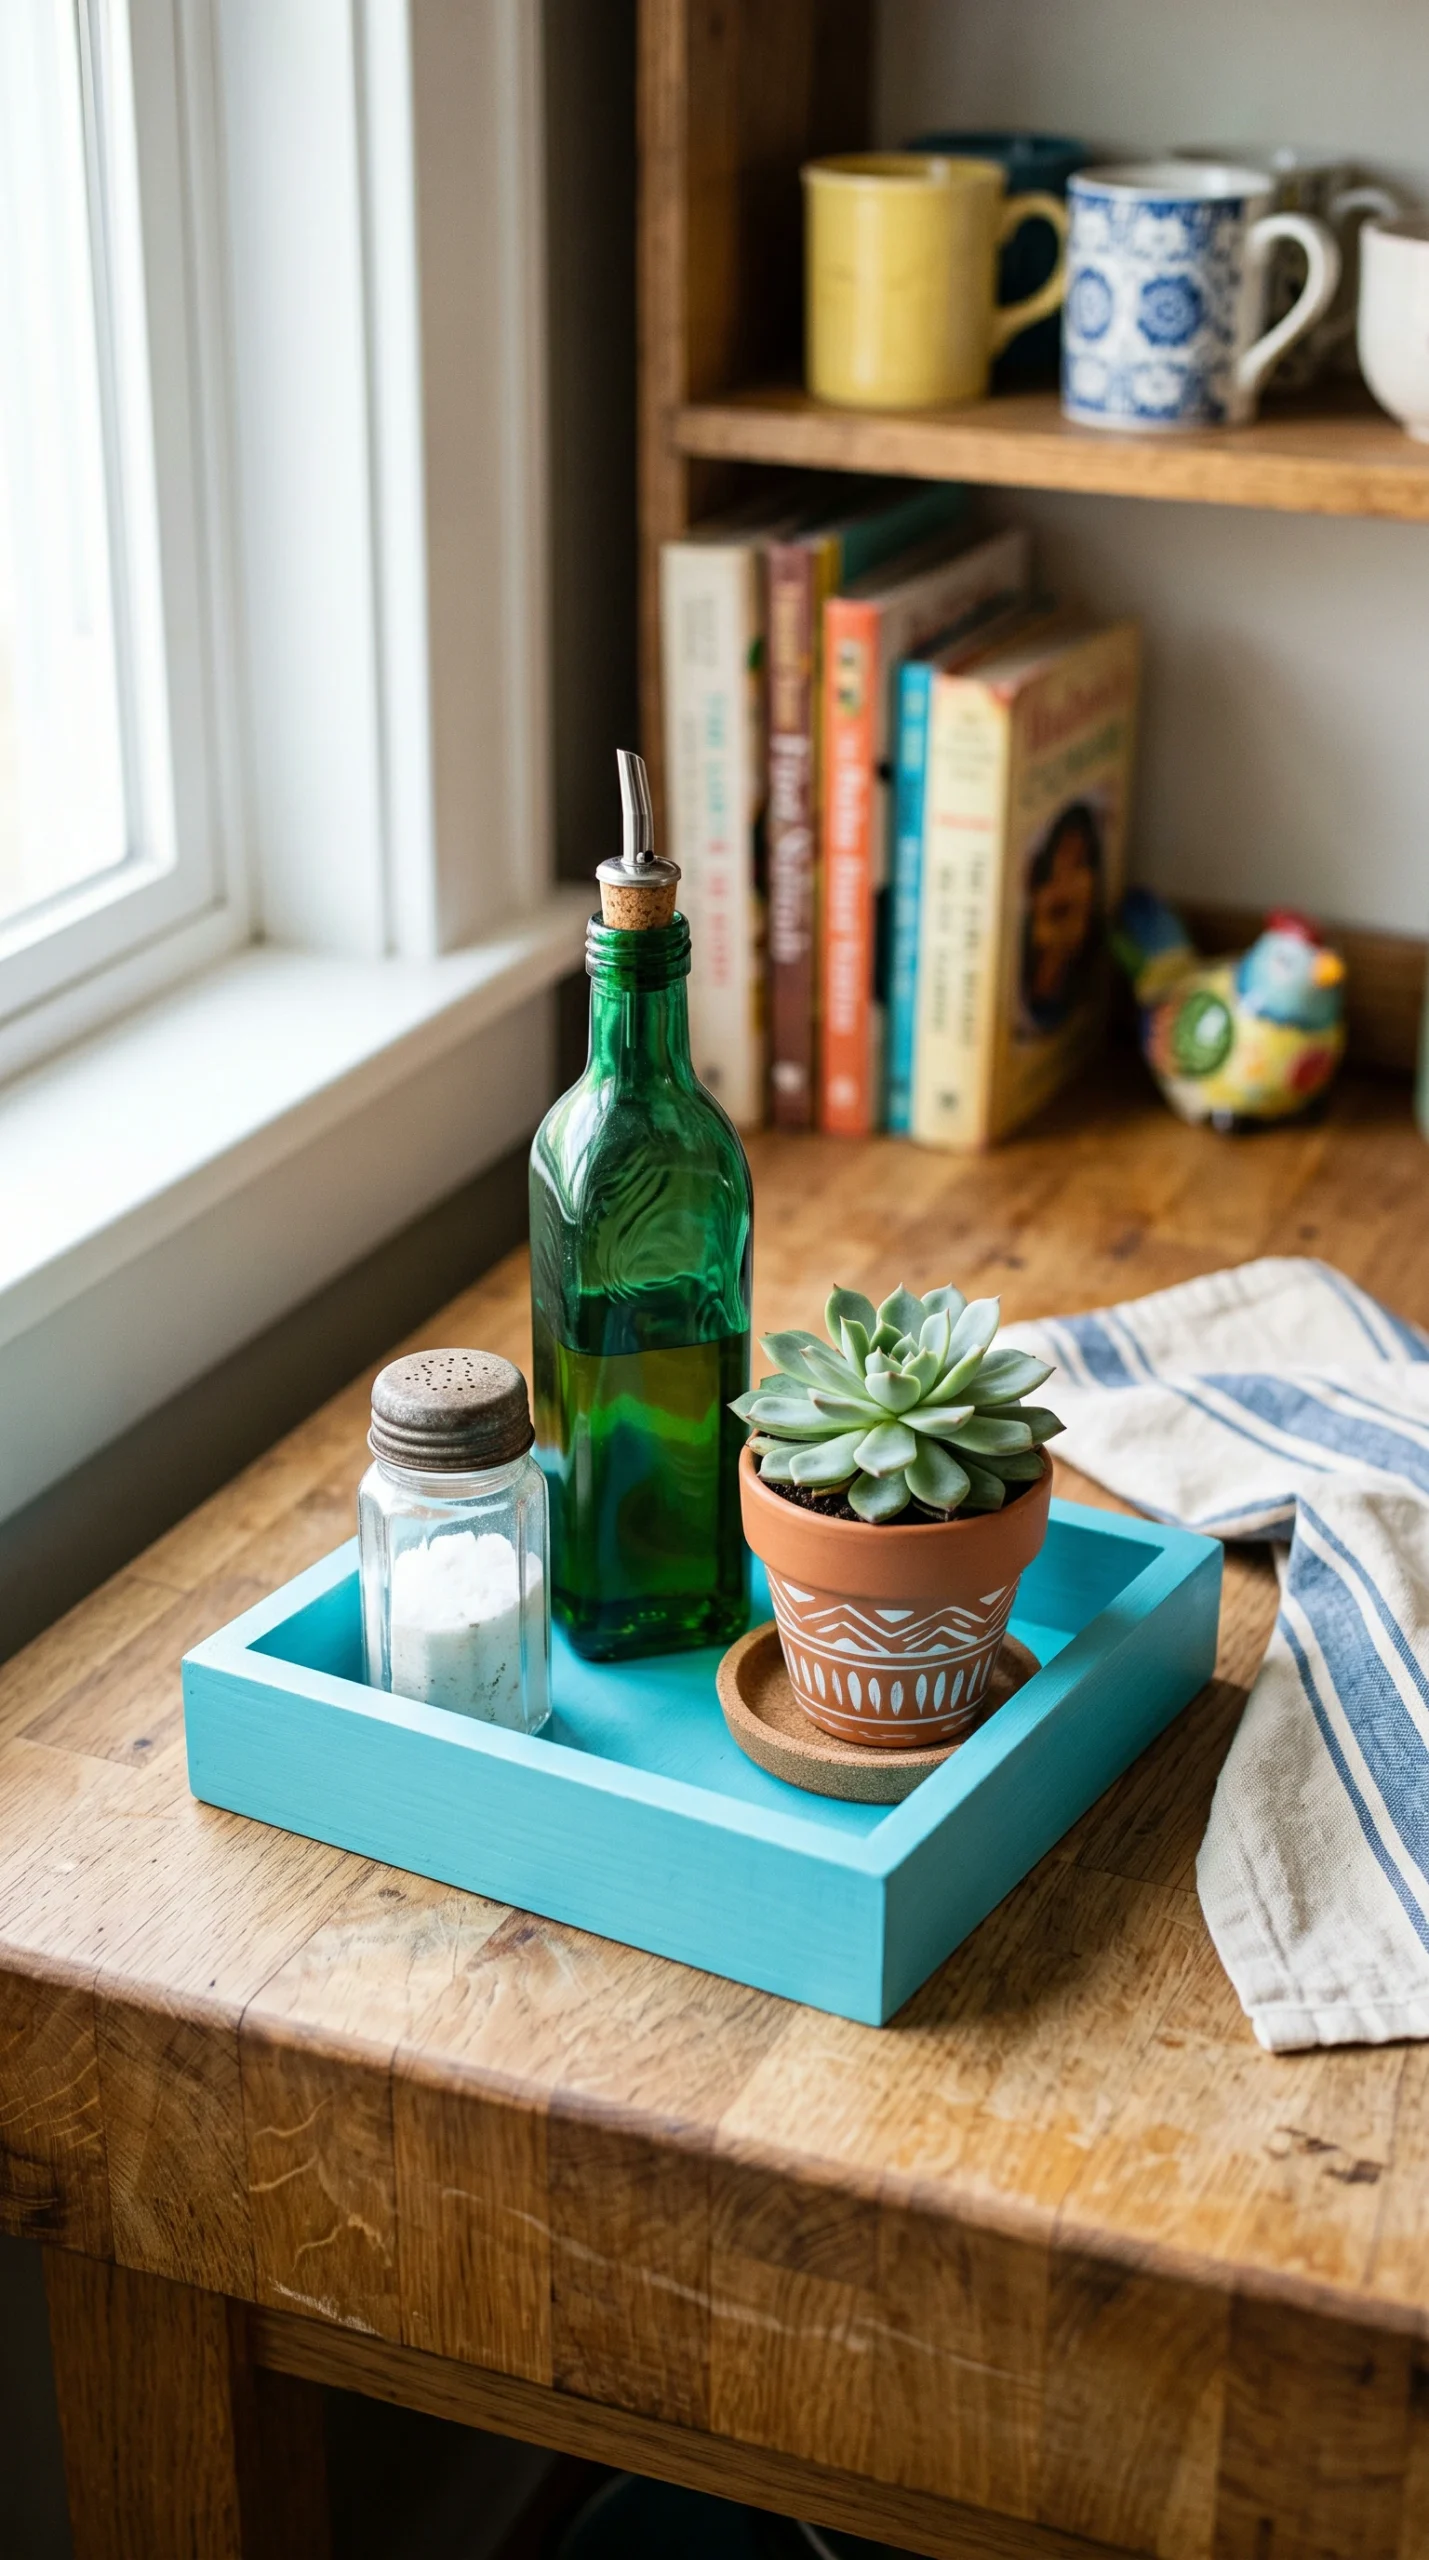
- Tray Dimensions: Corral loose countertop items—such as an olive oil cruet, salt cellar, pepper mill, and small potted succulent—inside a single 12×18 or 14×20 inch (30×45 to 35×50 cm) painted wooden tray or tarnished silver platter.
- Visual Boundary: The tray establishes a clear physical boundary. Instead of multiple small objects cluttering the counter, the eye perceives a single organized decorative “island,” leaving the surrounding 80% of countertop completely open for active food preparation.
For detailed historical insights on period-accurate ceramics and retro accessories, explore our companion guide on vintage whimsical kitchens.
Honest Drawbacks, Maintenance Realities, and Cleaning Protocols
Open shelving offers unmatched aesthetic joy and everyday convenience, but living with exposed dishware in an active culinary environment requires accepting specific ongoing maintenance responsibilities.
Practical Challenges and Care Protocols
Keep these functional realities in mind during your planning:
- Airborne Grease and Dust Accumulation: In kitchens without heavy commercial ventilation, cooking oils vaporize, float into the air, and settle onto horizontal shelf surfaces. Displayed glassware and dishes positioned within 48 inches of the stove will develop a tacky dust film unless washed regularly. Only display dishware that you use and wash daily or weekly, and plan a monthly wipe-down of timber shelves with a warm water and mild degreasing dish soap solution.
- Airtight Pantry Food Protection: While decanting grains into vintage glass jars looks beautiful, vintage jars lacking modern rubber gaskets can permit humidity infiltration, resulting in stale crackers or attracting pantry weevils. Always inspect gaskets and store reserve baking flours in sealed pantry bins.
- Vibration and Seismic Dish Drift: Slamming lower cabinet doors or operating high-powered blenders can cause subtle vibrations that slowly shift lightweight ceramic teacups toward shelf edges over time. For smooth-glazed shelves, apply small dots of clear museum wax beneath delicate heirloom pieces to keep them firmly anchored.
- Under-Shelf Hook Fragility: Hanging fragile, thin-walled antique porcelain cups by their delicate handles on brass hooks can cause handle micro-fractures if bumped by passing cookware. Reserve under-shelf hooks for sturdy everyday mugs or wire whisks, keeping delicate heirloom china stacked safely on flat shelves.